Sunday 31 December 2017

Bonnie Hunter's Quiltville Mystery "On Ringo Lake" Parts 3 & 4

I  finished all my blocks for part 3 yesterday.  I found these parallelograms the most challenging block so far:


I got all the pieces for part 4 cut yesterday and sewed the blocks today:


The clues for parts 6, 7 and 8 have all come out in the last three days but most of them are for sewing parts made in the first several clues together so I don't feel I am far behind, and as Bonnie says, it's not a race....

#quiltvillemystery #onringolakequilt

Saturday 30 December 2017

Christmas Tree Table Runner

This year my son's partner Catherine's mother joined us for Christmas dinner.  I had been wanting to make a Christmas tree table runner for awhile so decided to make one for her.  I went looking for a pattern and found a tutorial by Jenny from Missouri Star Quilt Company.  (https://www.youtube.com/watch?v=Gp6eVzKF34w)

Play Video

I didn't have the wedge tool called for but cut triangles that I thought looked the right size.  I used a 9 inch strip of fabric and cut the base of the triangles 8 inches wide.  Also, instead of having half a tree at each end, I used the background fabric for these pieces and only made 12 trees.  Here is my completed runner:


I used wood grain fabric for the tree trunks and used gold metallic thread to stitch in the ditch all the seam lines and create some wavy lines on the trees themselves.  The ditch stitching went well as I used my walking foot, but the wavy lines ended up being a bit tight.  Here's a close up:


I'll try to quilt a wavy line with my walking foot next time because now I want a tree table runner for myself!  I also need to make myself a tree skirt like I made the "kids" last year.(http://allikatquilts.blogspot.ca/search/label/Tree%20Skirt)
So, now I already have Christmas sewing  projects for next year!

Linking to Crazy Mom Quilts for Finish it up Friday http://crazymomquilts.blogspot.ca/2017/12/maine-socks-and-stash-organization.html

Friday 29 December 2017

Appliqued Lupine Wall Hanging for my Daughter and SIL to be

My daughter and her partner went to Iceland the end of June and came home early July engaged! There were large fields of lupines everywhere and my daughter was taking pictures in a field of lupines when the question was popped.  Here is one of her pictures:


To commemorate the occasion, I decided to make them a lupine wall hanging.  I found a pattern by Dana Verrengia, Wildfire Designs Alaska which I purchased from Northern Threads (https://www.northernthreads.net/shop/c/p/Lupine-Wildfire-Pattern-by-Wildfire-Designs-x15897803.htm)

I don't normally applique and if I do it is something very simple.  The first day I started out cutting out the background grass and some timothy and got them fused together. So far so good.  I'm not really loving the grass, but I really like the timothy! Like that sky fabric too. (The design wall could use a good de-threading though):


The second day I started cutting out tons of teeny tiny little lupine pieces and started to wonder if I would be able to figure out where they all went and get this project finished or not.  The cutting out of teeny tiny pieces also continued into another day:


The fourth day I started working on fusing the teeny tiny lupine pieces together and I am feeling confident I can get it done and have it look decent.  Here is a picture of the main lupine stalk about half done on my Teflon pressing sheet beside the pattern so you can compare:


Here is the main lupine stalk as well as two little ones fully done and all added to the wall hanging.  I'm feeling pretty pleased with my progress and liking that the grass is getting more and more covered up.  (The design wall could still use a good de-threading. Any suggestions on a good way to accomplish it without affecting the batting?):


Here is a close up that shows all the teeny tiny pieces in the lupine blossoms:


The only thing left now is the big lupine leaves.  I got them all traced on my last bit of fusible and ironed on ready for cutting.  WHAT!  All my material to this point was either a solid or a batique which meant there was no right or wrong side to the fabric as either side could be used.  The fabric I had for the leaves was only printed on one side and I ironed the fusible to the right side of the fabric instead of the back which meant I ruined the fabric and wasted the fusible.  Since it was 4 in the afternoon, I decided to call it quits until another day.

A couple of days later I had more fusible and got the lupine leaves done.  Since some of the leaves hang out of the picture onto the border I also had to attach it.  I was working with a jelly roll and only had one WOF strip of each colour so the border had to be two colours:


Here it is bound with two colours of green fabric.  I left the pins in it just in case I get the courage up to do some thread painting before declaring it done:


Here is the back where you can see the triangular corners to hold a dowel as well as the label (I have obscured their last names for privacy):


And here are my daughter Ainsley and SIL to be Jack opening it on Christmas morning:


As you can see, I did not add any additional thread painting or stitching, maybe once I've had more practice I can embellish it.

Here's another of my daughter's pictures of the  lupine fields in Iceland:


Linking to Crazy Mom Quilts for Finish it up Friday http://crazymomquilts.blogspot.ca/2017/12/maine-socks-and-stash-organization.html

Thursday 28 December 2017

Irish Plaid Quilt

I started this quilt more than a few years ago.  The pattern was printed 8 years ago and I know I did most of the piecing for it at a retreat 4 years ago.  When I showed it to my son after the retreat, he wasn't as enthused about it as when he picked the pattern and fabrics, so it was put to the side. This past September, his partner asked for a quilt for Christmas without any specific pattern in mind but told me her favourite colour was green.  Well, I showed them the completed centre of the quilt and it was decided I would finish it for them for Christmas.  Here is the centre of the quilt and one border:


I am usually not a "pinner" but for these borders, all the matches to continue the design did not nest but crossed each other so I ended up pinning almost every inch:


It took me almost as long to make and attach the borders as it had taken me to make and sew together the quilt centre.  I would have liked to bind it using the darker green, but did not have enough fabric left and bound it with the medium green which in the end I think looks nicer as it just looks like the border goes right to the edge of the quilt:


Here is a view of the back with the sun shining through:


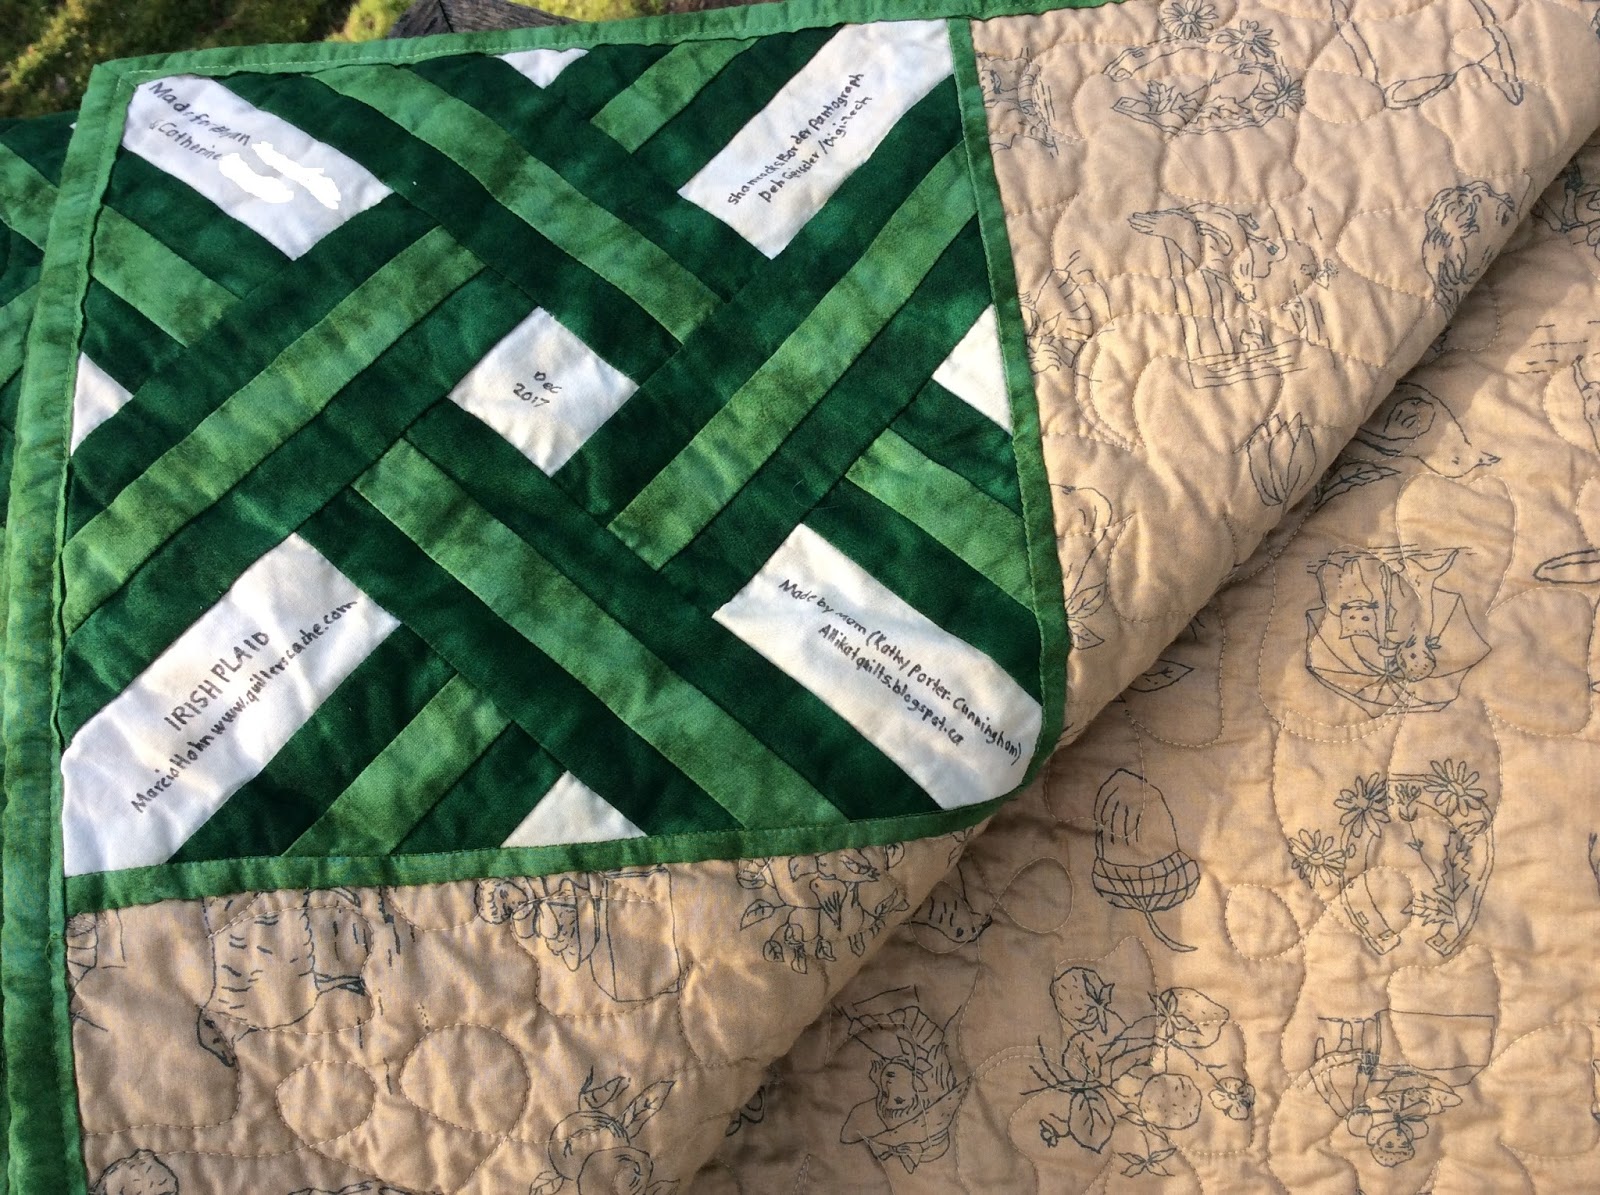
I used a spare block as a quilt label (last names blocked for privacy):


Since the name of the quilt pattern was "Irish Plaid" I decided to quilt it with shamrocks and used a pantograph called Shamrocks Border by Deb Geissler and Digi-Tech.  I was partway through quilting when I was thinking about shamrocks and four leaf clovers and them being lucky and started laughing when I thought about the quilt being lucky etc....


Here is a picture of my son Bryan and his partner Catherine holding up the quilt Christmas morning:


And later my son sent me a picture of it on their bed:


I got the pattern from "Quilter's Cache", however I did not paper piece it, but I did strip piece parts of it.  (http://www.quilterscache.com/I/IrishPlaidBlock.html)

I am glad that this quilt went from being put aside to being wanted again and getting an old UFO (unfinished object) out of my sewing room and being used!  Wasn't it lucky that Catherine's favourite colour was green?

Linking to Crazy Mom Quilts for Finish it up Friday http://crazymomquilts.blogspot.ca/2017/12/maine-socks-and-stash-organization.html

Wednesday 27 December 2017

Llama Christmas Ornaments

I wanted to show these ornaments earlier, but because they were used as gift tags to be attached to gifts for my family this Christmas, they had to wait until after Christmas Day.  Here they are with their noses embroidered:


And here are two completed with scarves, eyes and hanging loops.  Once their purpose as a gift tag was over, they became a tree ornament. I included the year in the writing on the back so we will always know which Christmas they were made:


I found the pattern on the blog "wild olive" by mollie:  http://wildolive.blogspot.ca/2015/12/easy-project-last-minute-gift-llama-or.html  I made mine with two shades of felt to give them a bit more depth.  I was able to make all 16 llamas with 4 pieces of different shades of brown felt and half a piece each of red and green.  If I make them again, I might try french knots or beads for eyes instead of the goggley eyes as when the goggley eyes are pointing in different directions, it gives them a crazed look which was not my intention!

Linking to Crazy Mom Quilts for Finish it up Friday http://crazymomquilts.blogspot.ca/2017/12/maine-socks-and-stash-organization.html

Friday 22 December 2017

Fat Quarter Shop 2017 Patchwork Quilt Along - Twelfth month

I actually made these blocks several days ago, but it was a rainy day so not good for pictures.  (Plus working on Christmas sewing was a priority.)  Then the sun came out but it was really windy.  Today was still sunny and less windy so here are my Mother's Own blocks for December:


Oops!  I didn't notice until I saw the picture that one of the above blocks is not the same!  I will have to fix it before I start putting the blocks together.....

And here are all 72 of my blocks:


I am really pleased with how they all look together and am looking forward to completing this quilt in 2018!

I have made my donation to the Atlantic Chapter of Make-A-Wish Canada.  If you want to see any details on this quilt-along, here's the link:  https://blog.fatquartershop.com/patchwork-quilt-along.html

Linking to Crazy Mom Quilts for Finish It Up Friday http://crazymomquilts.blogspot.ca/2017/12/maine-socks-and-stash-organization.html

Friday 8 December 2017

Mug Rug Challenge & Santa Log Cabin Ornaments

Last night was my sewing guild's Christmas Party.  We had lots of good food and played some fun games and had a Mug Rug Challenge with prizes.  Here is my mug rug along with some sewing related mugs which were part of the prize packages.  (I did not win, but had the mugs to put the prize packages together):


The reason all the buttons were dumped out is everyone was given a button and used it to vote by dropping it in a cup beside their preferred mug rug.  I made the wrapped candy mug rug from a free pattern which you can find here (http://fortworthfabricstudio.blogspot.ca/2015/11/peppermint-twist-table-runner.html)  It is by Jayne from Twiggy and Opal.  The main pattern is for a table runner with bonus coasters.  I would like to make the table runner too.

I also made some Santa Log Cabin Ornaments to go in the prize packages using 1" strips so I believe these were 6" square before two sides were sewn up to make a cone shape.  I forgot to take any photos while I was constructing them and just made them up from a picture I had seen:


Here is a close up of one so you can see the detail:


One mug rug won by quite a large margin and two tied for second place.  Here is a picture of the winning mug rug courtesy of our guild's photographer:


Unfortunately, I do not have pictures of the runners up mug rugs.

One of the games we played involved everyone standing in a circle holding a fat quarter of fabric while someone read a story aloud filled with the words  "left" and "right".  Every time these words were said, you passed the fabric in your hand to the person on either your left or right.  (For example:  Jane still had not found the right piece of fabric in order to finish her quilt and there were only ten days left until Christmas.)  The narrator had to stop a couple of times when too many lefts and rights were said close together to straighten us out and several people ended up with three pieces of fabric and others had none.  It was a lot of fun and you went home with a different piece of fabric than the one you had brought in.

Linking to Crazy Mom Quilts for finish it up Friday ( http://crazymomquilts.blogspot.ca/2017/12/gingham-quilt-complete.html)

Monday 4 December 2017

Bonnie Hunter's Quiltville Mystery "On Ringo Lake" Part 2

I got all my strips cut for Part 2 (http://quiltville.blogspot.ca/2017/12/on-ringo-lake-part-2.html):


I decided to go with the method of making flying geese using Bonnie's Essential Triangle Tool because I like the no waste aspect of it and also if there is less trimming than using the large squares of fabric to make four at once, I'm sold.  Here's a sampling of some of my completed geese and I think I will use this method in the future, I barely trimmed at all, and could probably have gotten by without the trimming I did do:


Just for fun, here are a few of the blocks from Part 1 and 2 together  I do like the turquoise and coral together:


I wonder what blocks we will be making for Step 3?

#quiltvillemystery #onringolakequilt

Linking to (http://quiltville.blogspot.ca/2017/12/mystery-sunday-link-up-part-2.html)